Tasks
Tasks is where you make and configure all of your jobs and job types. There is an order to follow to ensure you get the best results from your time and effort here. We recommend starting off with nothing enabled, this way you get to control everything about your jobs. Plus it helps keep your mobile app experience clean and easier to use for your field techs.
Features
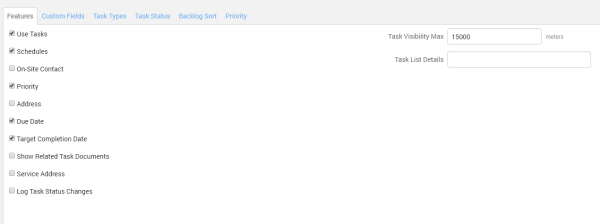
Features holds a check box list of items which you can choose to display by default on a job. This includes things like due date, priority, service address and more. Enabling any of these options will display them on all jobs that you create.
Task Types
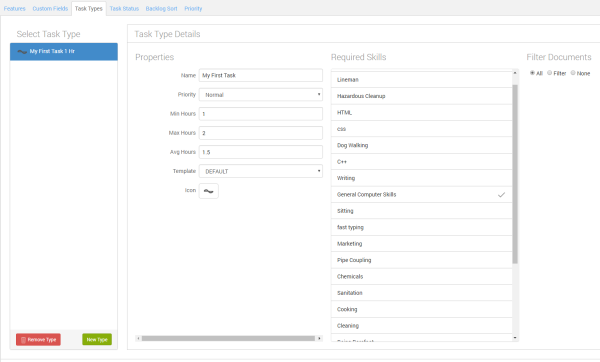
The next step will have you adding jobs and tasks, giving information about each task such as name, priority min, max, and average hours to complete, as well as assigning and icon to the task and choosing which skills are best suited for each individual task. You also have the option of choosing what custom field template a task will be using. Next is the Required Skills section. Here you can tag jobs with the skills you deem necessary. Skill tagging helps with scheduling and assigning jobs to field crews/techs. Choose which skills you want by clicking them. The last set of options for each task is being able to choose whether or not to allow documents to be used within the mobile app.
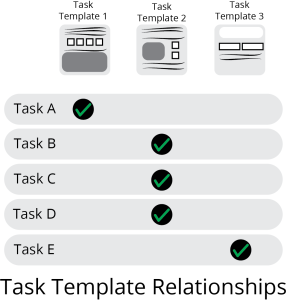
Custom Fields

Custom field templates are driven by and ultimately determined by task types. Task types are driven and become useful by using custom field templates. The two work together to make working a breeze. Custom Fields can be template-ized and those same templates can be used for many job types. The relationship between them is of 1 to many. Meaning 1 template can be used with many task while tasks themselves can only use one template at a time.
Task Status
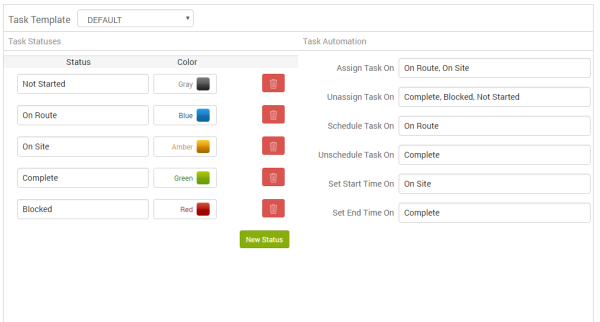
Here you can assign what types of status your organization will be using. You can choose the name and color for each one as well as configuring task automation triggers for each status type. Automation triggers are added by typing in information. Multiple triggers can be assigned to the same automation task. In this example we have Unassigned Task On set to unassigned tasks when they are marked complete, blocked or Not Started. This is a great way to same time and assigning duties.
Backlog Sort
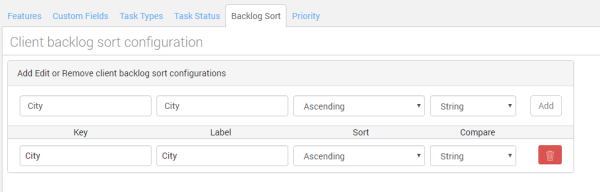
This tab contains the configuration for task sorting options. Here you can add as many filters as you wish as well as being able to choose what sorting each will have and even a field to compare sorting options.
Priority
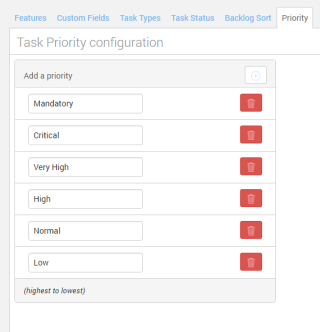
Here you can add or delete priority status. Our example is a list of common priority types. You can add and label as many priority labels as you want. Simply press the + button and type in your own priority label. If you wish to remove one simply click the red trash bin icon to remove a priority from the list.