The route planner is a great way to allow the system to plan out your day in the most efficient way possible. The route planner takes your selected tasks and allows you to build in:
- Start and end points
- Start time
- Transition time
- Whether to round start times
- Duration and start of lunch
The planner will return a route for your field staff that minimizes drive time, while still allowing as many tasks as possible throughout the work day.
In order to activate Route Planner, the checkbox Enable Route Planning from Schedule View must be checked. It can be found by going to App Builder -> Task -> Features.

Proposing a Route
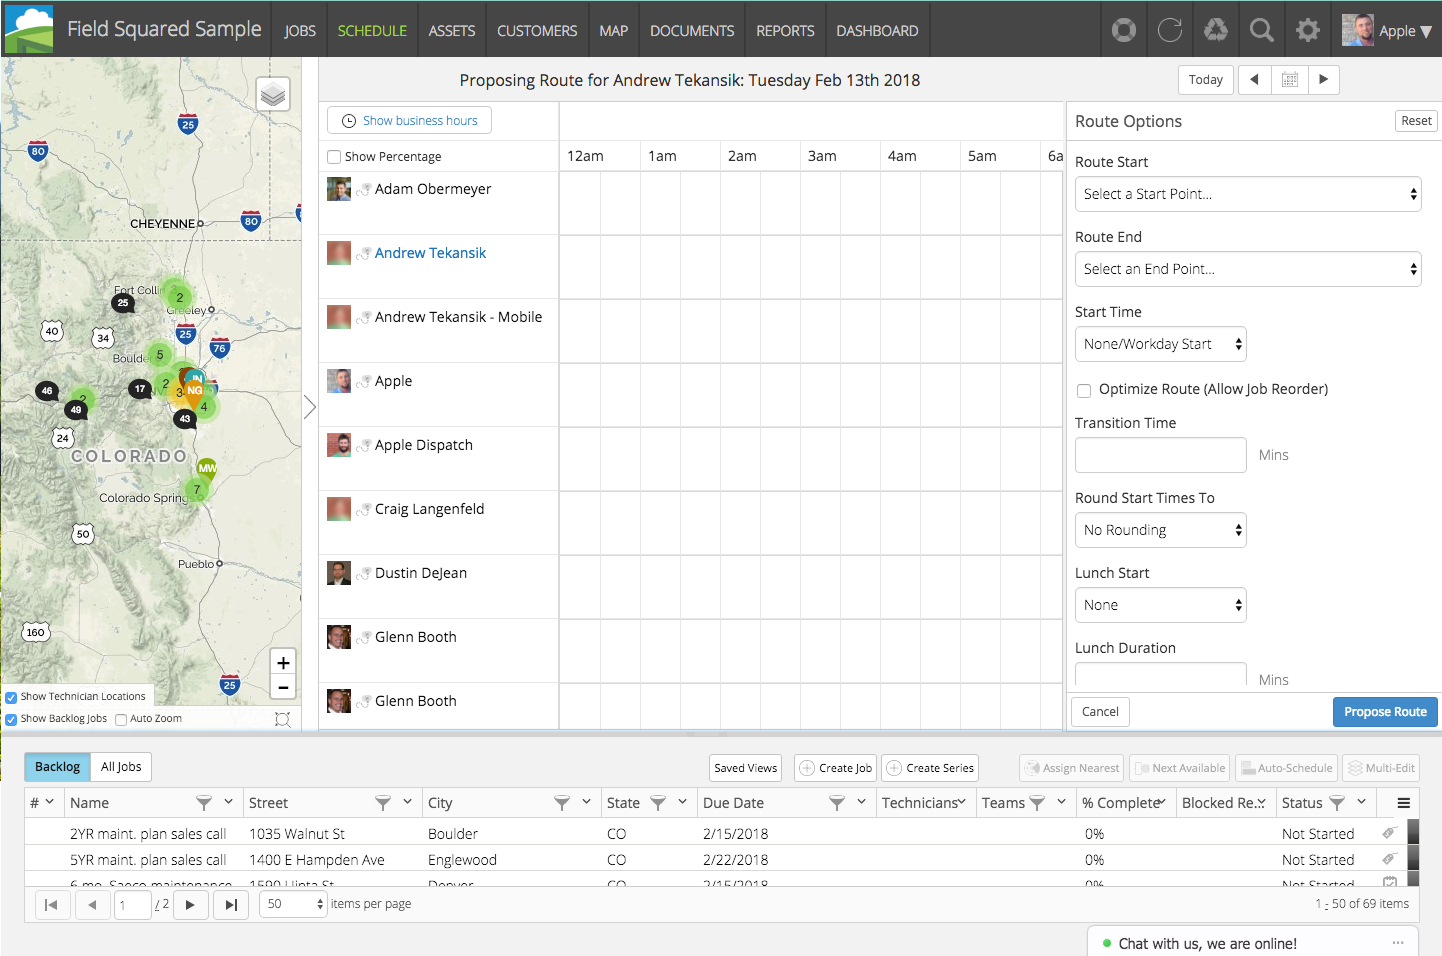
- Once Route Planner is enabled, and you are using the day view, a route icon will appear next to the user’s name. Clicking this will open the route planner for that user.
- Select the date you wish to create the route by using the calendar toggle at the top of the page (ensure you are on a single day view vs. a week view)
- Select the user by clicking the route planning icon to the left of his/her name (the user’s name will highlight in blue font, and the route planner panel will appear to the right.
- Select the Tasks that should be added to the route. This can be done by two methods:
- In the map to the left, select any applicable tasks by clicking the bubbles associated to the task. Hovering over the bubbles will provide information on each specific task.
- In the list below, select any applicable tasks by clicking the tasks (selecting SHIFT + task selection will allow multi-selection from the list)
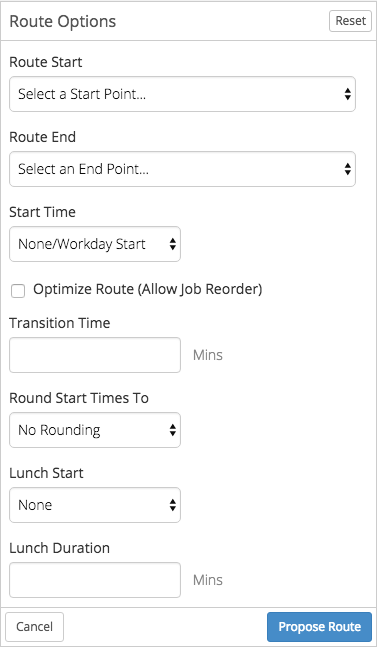
- Choose all applicable options using the route planner panel. Available options are:
- Start and end locations for the route
- Start time for the route
- Optimize route (used for optimization of existing tasks and new tasks combined. See detail below on this feature.)
- Transition time (the amount of time needed after the task to complete paperwork, or other task duties)
- Start time rounding (allows even start times for tasks/appointments)
- Lunch start & duration (allows for a lunch to be built in, but due to scheduling optimization features, may not provide the exact time requested)
- Note the Tasks to Append section at the bottom of the panel. Ensure this information is correct as these are the tasks the route planner will be creating a route for.
- After clicking Propose Route, the route proposed by Route Planner will be show on in the map with blue track lines. The route details are provided in the Route Planner panel on the right.
- Tasks without valid locations will be listed under the Tasks Without Valid Location heading in Route Planner.
- Tasks that were not able to be scheduled will be listed under the Tasks Couldn't Fit heading in Route Planner.
- Tasks may not fit if including them would go outside of business hours. This could include the time required to perform the task itself, or the drive time to get to and from it.

- If the proposed route is acceptable, click Save Route. Route Planner will then save the route to that user and will return to the Schedule View. If not, press Back and adjust the options accordingly.
Optimize Route Feature
This feature allows the dispatcher to add additional tasks to a user’s schedule, and either allowing a reorder of those tasks, or asking the route planner to create other tasks around that user’s schedule. Here are some examples:
- Glenn has a task on his schedule for 10:00am on Tuesday. This task time cannot be changed, but other tasks need to fit into Glenn’s schedule in the most efficient way possible. As a dispatcher, using the process outlined above, you can add multiple other tasks to Glenn’s schedule and keep the Optimize Route button unchecked. This will force the route planner to plan around that task, and optimize all of the other tasks around that one.
- Joe has a task on his schedule for 3pm on Monday. This task time is flexible and can be changed. As a dispatcher, using the process outlined above, you can add multiple other tasks to Joe’s schedule and select the Optimize Route button. This will force the route planner to re-order all of Joe’s tasks (including the one that was already on his schedule) in the most efficient way possible.
Notes for Use:
- No more than 25 tasks may be configured at a time via route planner. To add more than 25 tasks, it must be done manually to the user’s schedule.
- Route planner works only in your specified business hours. If any task cannot be added to the schedule due to business hour limitations, the error ‘Tasks Couldn’t Fit’ will be displayed.
- Field Squared uses metrics from MapQuest to calculate drive times and typical traffic patterns in order to create routes. Information is not guaranteed to be accurate.