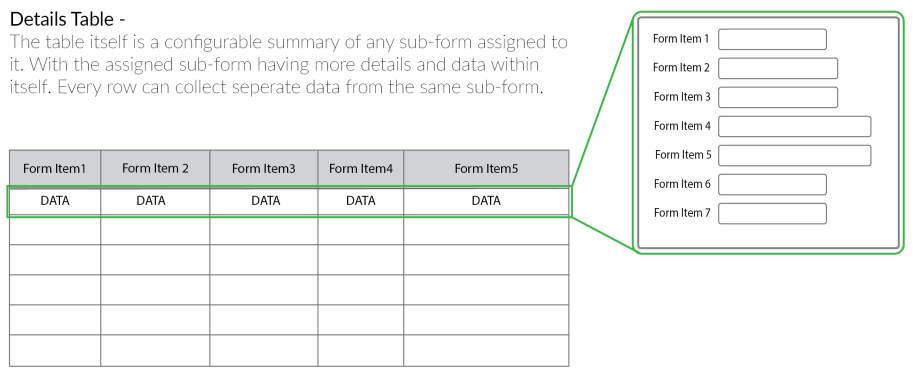
Details Table
A details table is always sized to 1000px in the iPad app and smaller on an iPhone or Android device. Column widths are relative to each other, not the table. Column widths can be changed but the overall size of the table will remain the same in the app.
Details Tables also have the ability to auto-populate with data from the asset model, tasks, catalog, or anything else. To learn how to do this or get help, please call field squared to learn more.
Sub-forms
When setting up a Details Table, it is very important to set up your sub-forms first! Otherwise your Details Table may not function as intended.

Plan, plan, plan. Planning is the first step in creating a useful Details Table. What kind of controls and information do you want to have in your sub-forms? What kind of information do you want your Details Table to display?
Sub-forms are the key ingredient to the Details Table. It is the sub-form data that determines what will be displayed in a table. Learn how to make and use documents and forms.
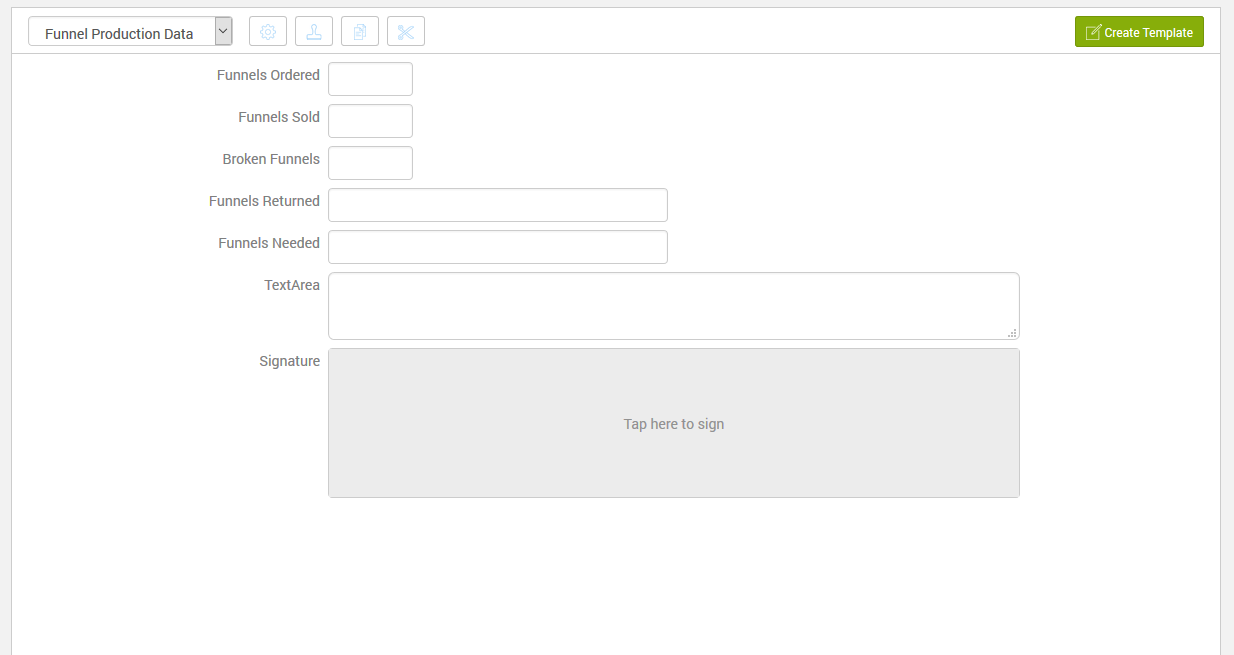
Once you have your sub-form created, you can assign it to a table using the drop down menu in the table settings.
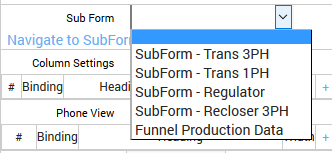
Note: Only 1 sub-form can be assigned to a table at a time but you can select which sub-form you want to use. For multiple sub-forms you will need additional Details Tables.
Configuring
Once you have your sub-form ready to go. It's time to add a Details Table to your form and configure it for use. When dragging the Details Table control onto a new form it will not be populated. This is because there is no sub-form assigned to it yet. This is changed by clicking the drop-down labeled SubForm (see above image). Next you'll see extra information which displays just below this drop down menu.
Column Settings
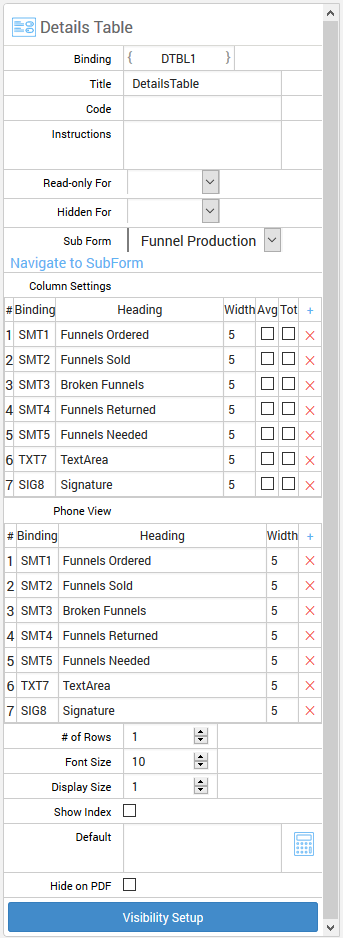
There are various settings you can change, all of which can be edited to best suit your needs.
First, you'll notice an index labeled with a "#" symbol. This column is meant to show the order in which each column will display. This column will not display in the table, only here in the settings.
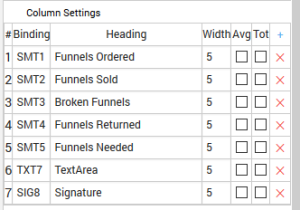
Next there is Binding. This column is meant to hold the unique binding name for each column which will be used in Strings and Expressions. These bindings will not display in the app.
Heading. In this column you will be able to change the display name for each column header. In conjunction with this setting is the Width setting. This setting will change the width of any column within a table. We recommend to keep it to multiples of 5 so you can keep track of them easier.
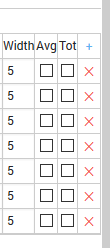
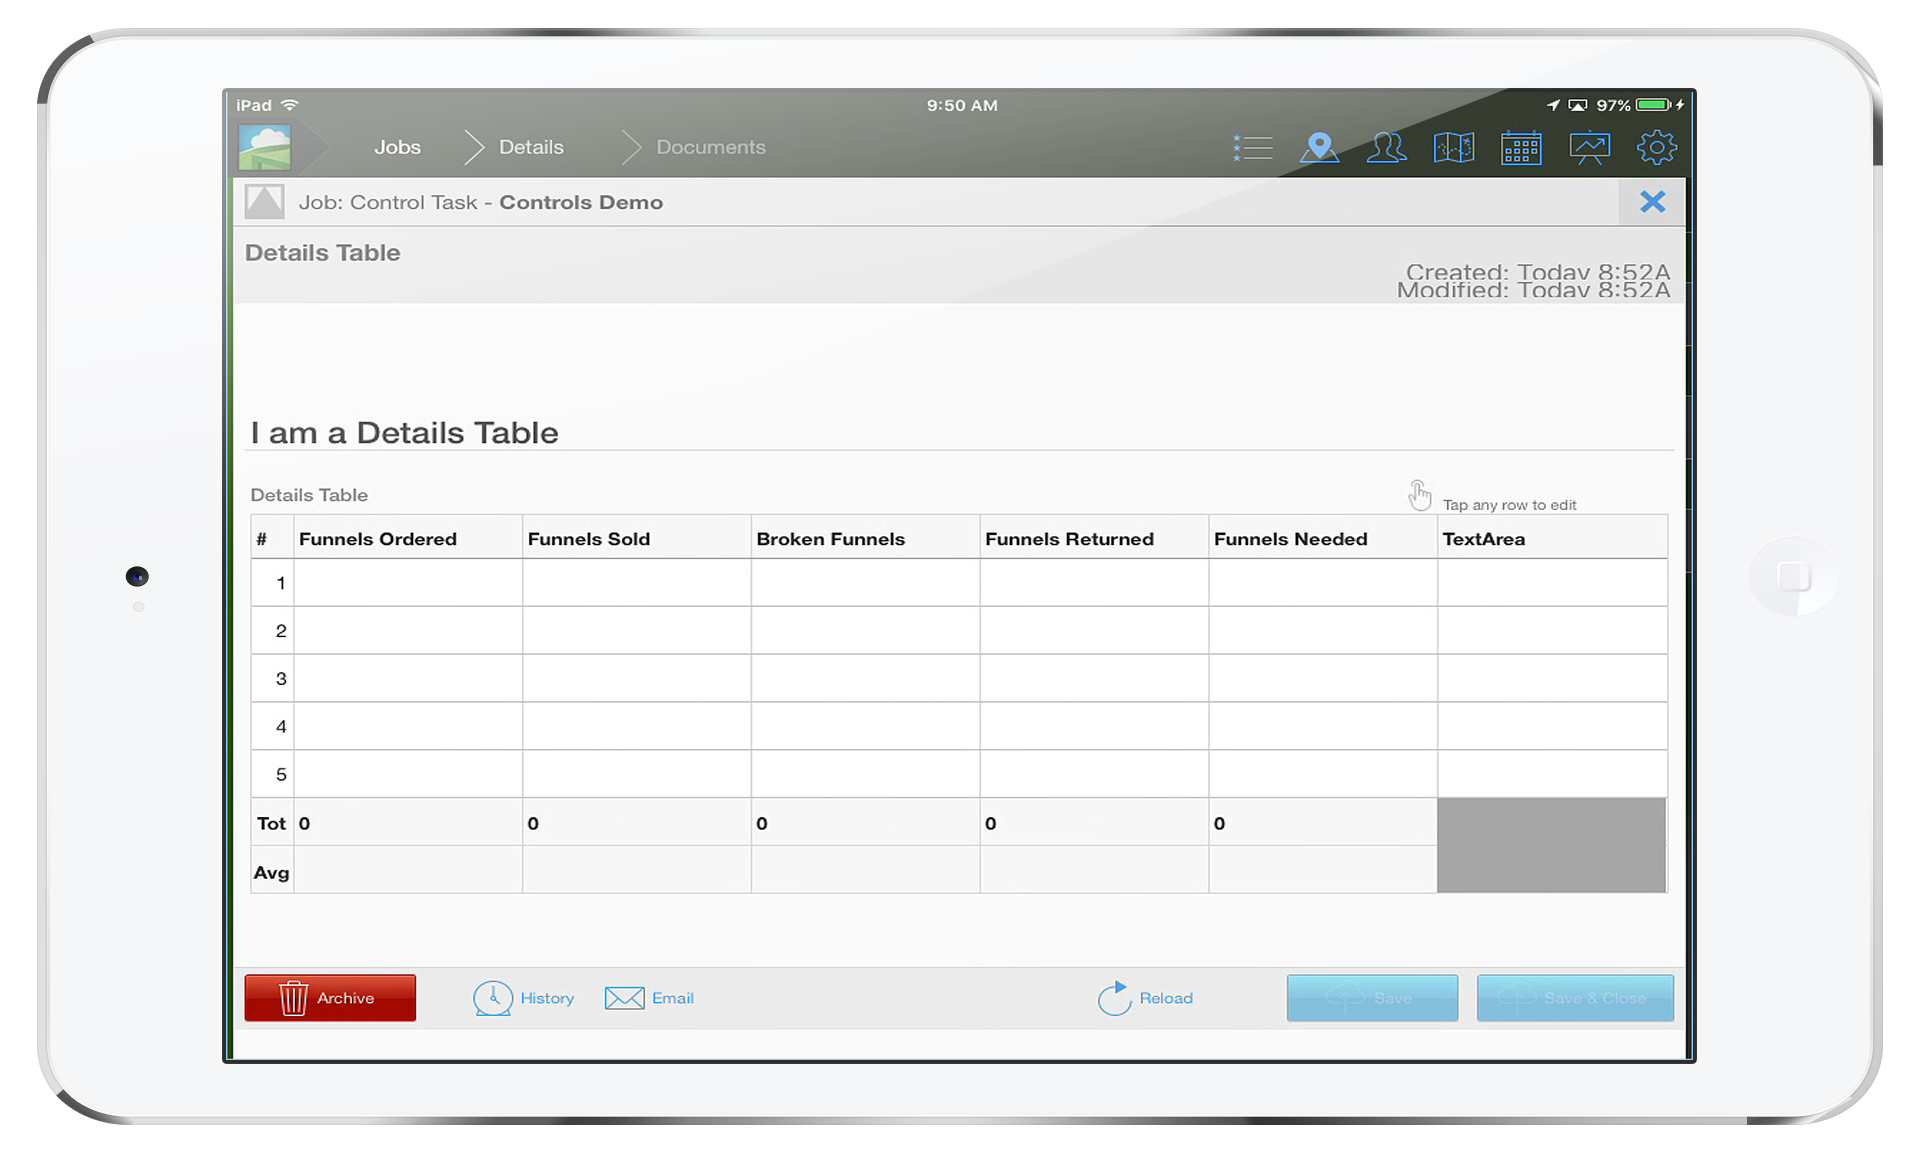
Next are you settings for displaying the Averages and/or Totals for any column. These are simple check-boxes. When checked the Details Table will show extra rows labeled 'Tot' or 'Avg'. These two rows will always be visible in a table when enabled.

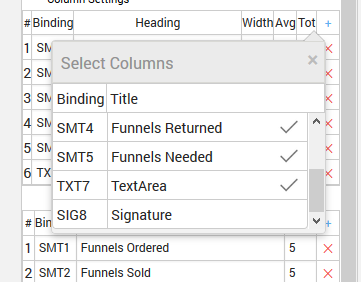
The last setting is labeled with a "+" symbol. This column will let you decide which columns will be displayed in a table. The "+" symbol will let you add any column to table and the red "x" will let you remove any column from a table.
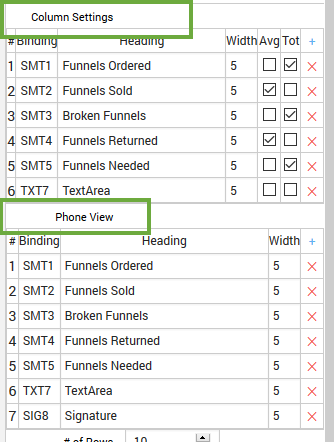
Views
There are two different views to choose from, Tablet View and Phone View. Each one can be configured separately. This is an important decision as phones always have less viewing area available than tablets, so adjustments to tables should be made accordingly.
The next options related to views are # of Rows, Font Size, Display Size, and Show Index.
# of Rows and Display Size are directly related to each other. # of Rows lets you choose how many rows a table will include. Display Size lets you choose how many rows will appear on a screen. When you set the Display Size to be smaller than a table with a larger amount of rows your table will become scrollable within the app. This way you don't have to limit the number of items included in your overall form.

Lastly is the ability to Hide a Details Table when exporting a Document as a PDF. All controls have the ability to be hidden or displayed in an exported PDF.
Using Details Tables
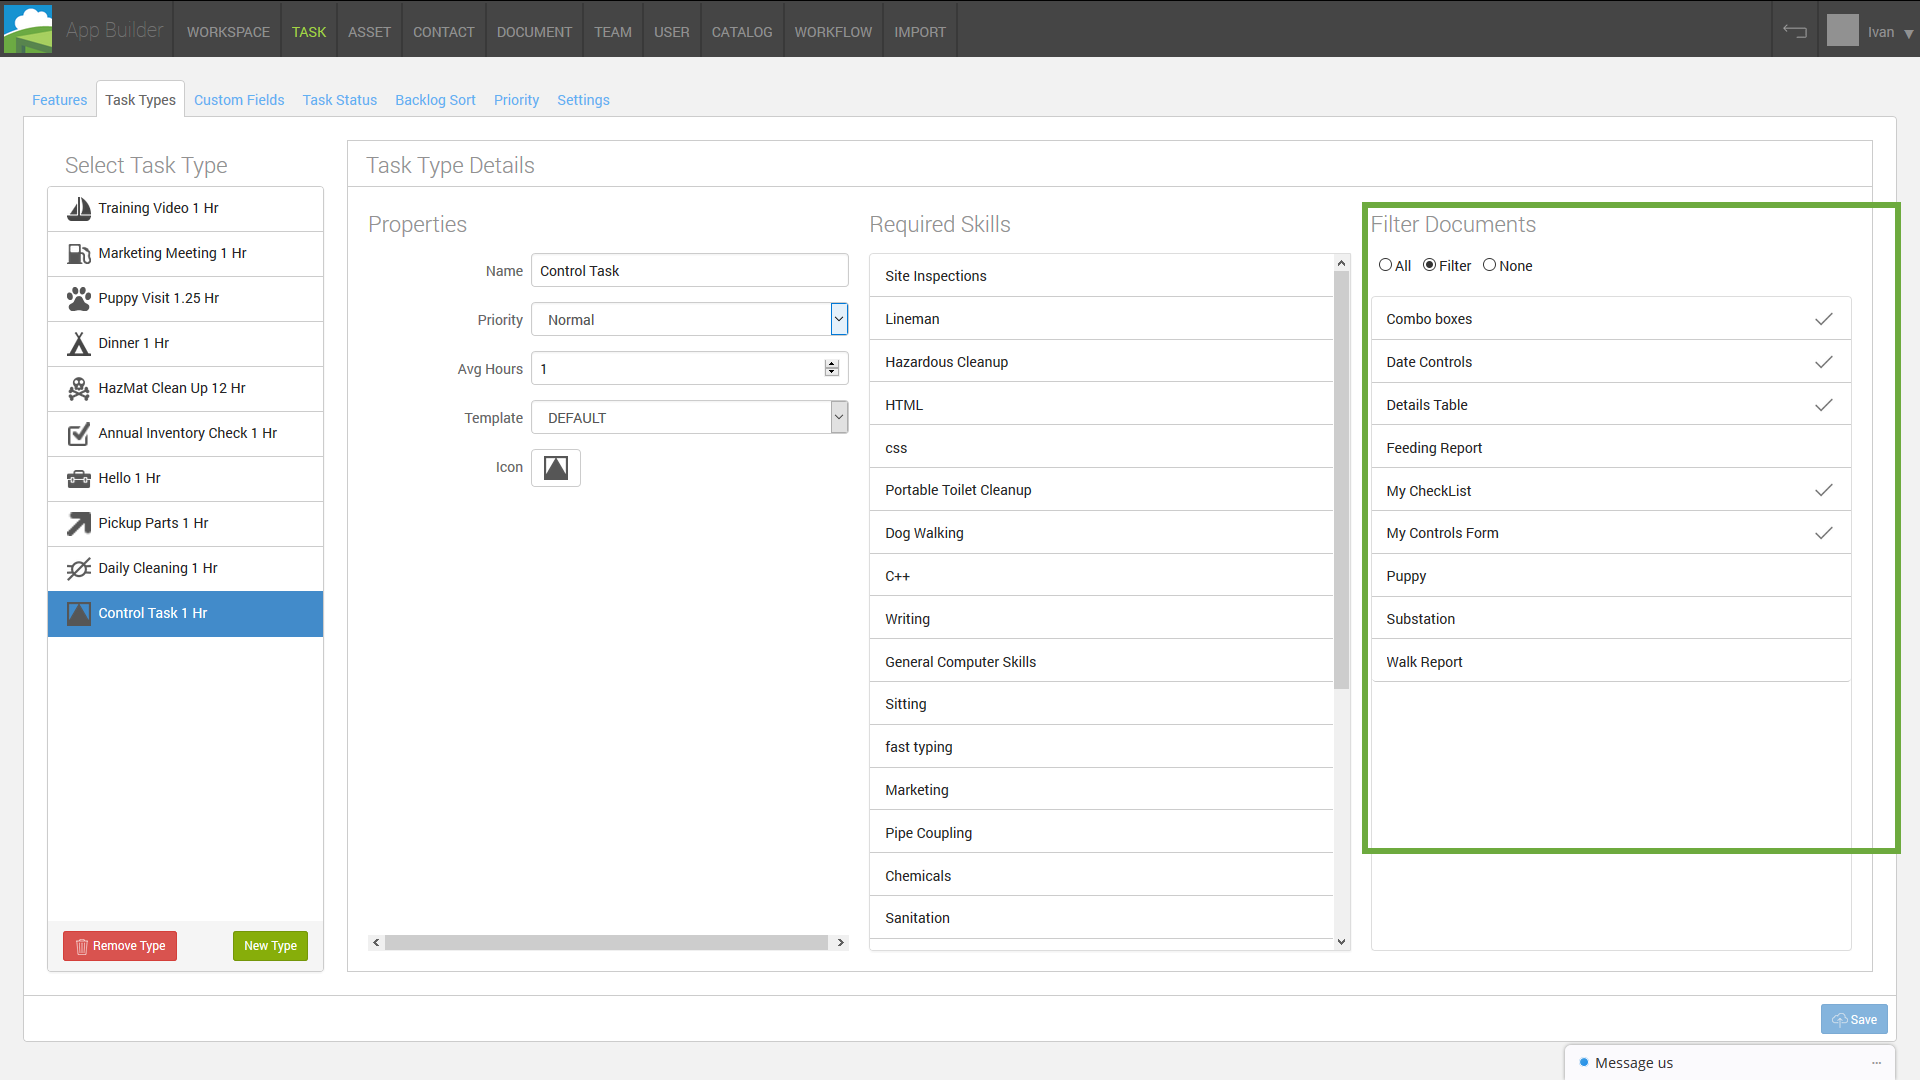
Now that you've got your sub-forms made, Details Table configured, and your Document complete you'll be able to apply the form to any of your tasks. This is called Document Filtering and is done in the tasks configuration section under "Task Types". Just select any task you'd like to add to your Document and select "Filter Documents" in the far right column.
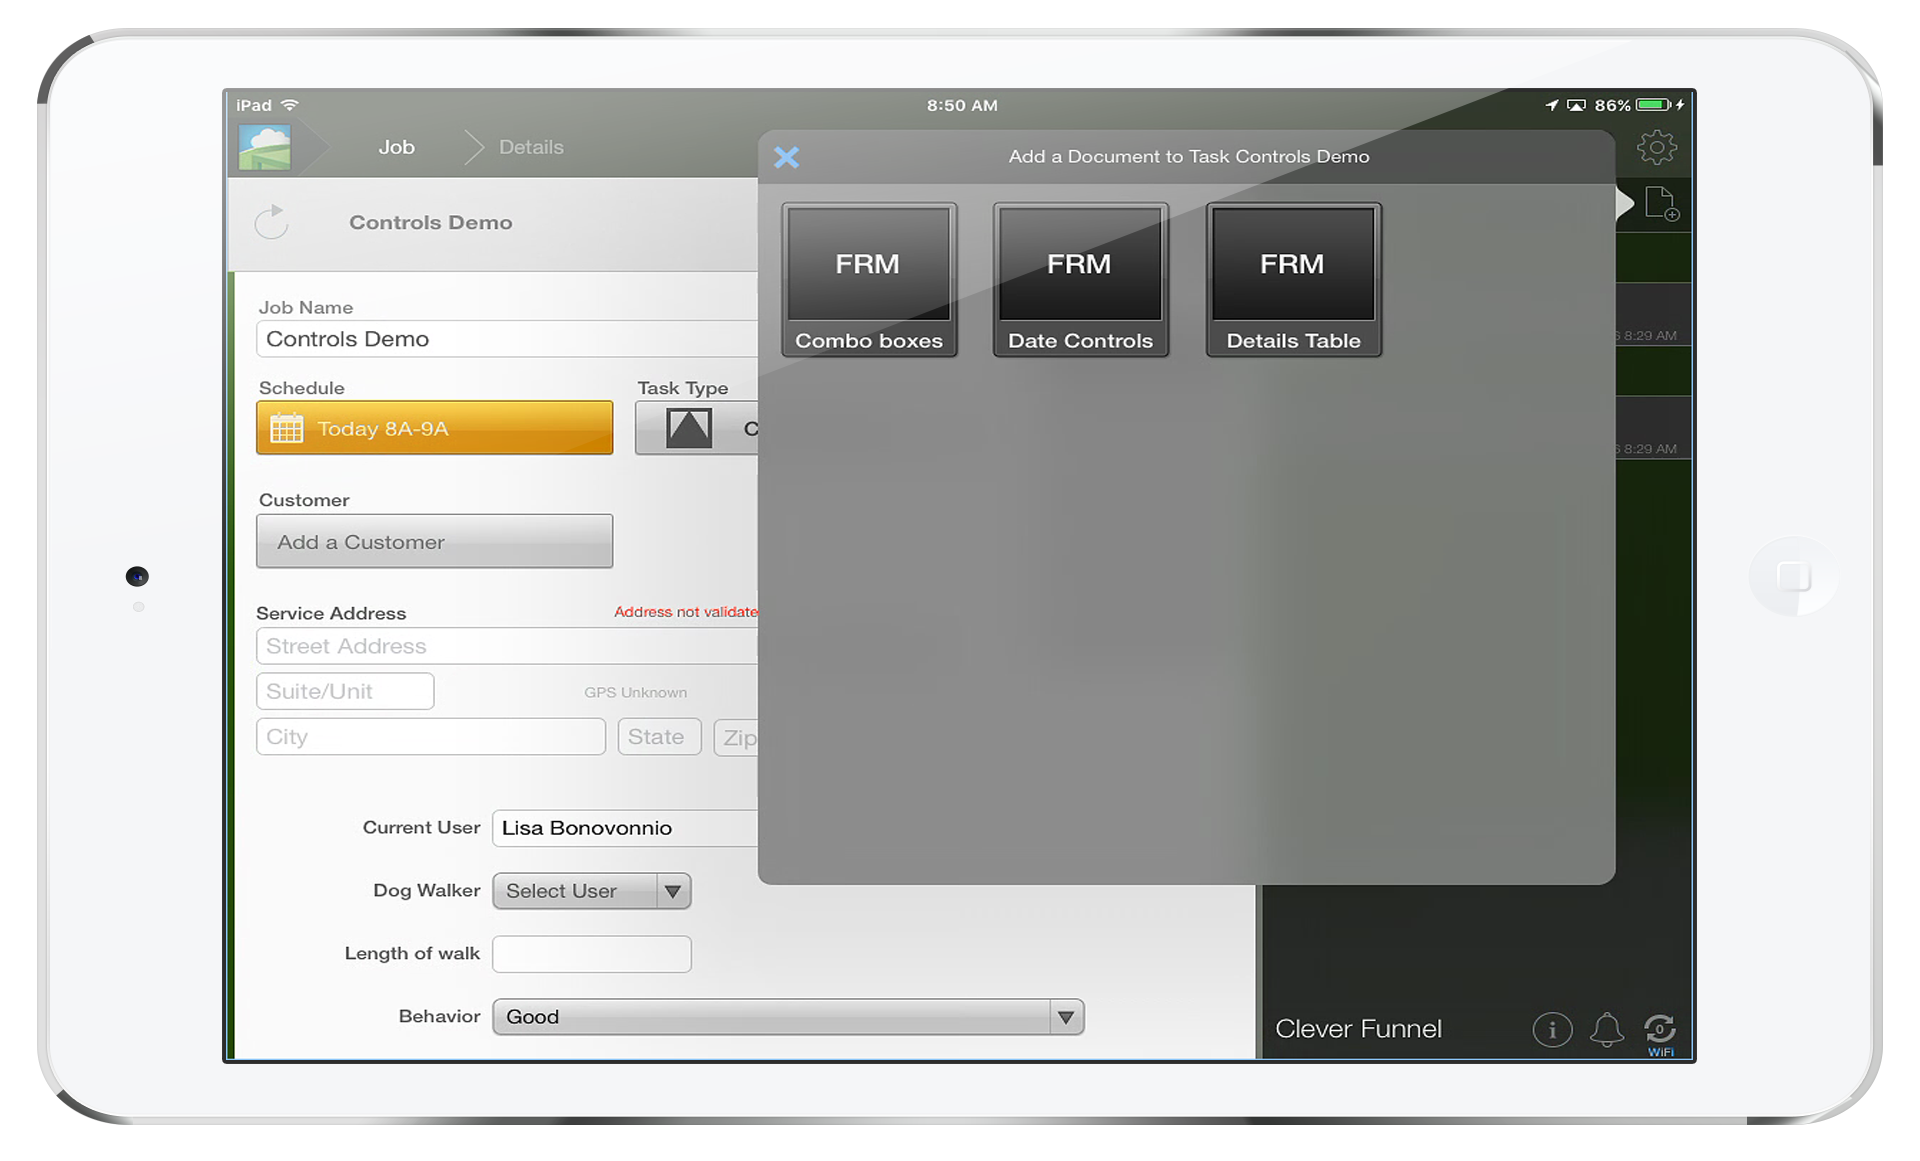
Once you've don't this, you'll be able to add this document to any task using the mobile app by clicking a task and selecting the "Add Document" button. From there, click the form and you'll see your new document with your Details Table included.
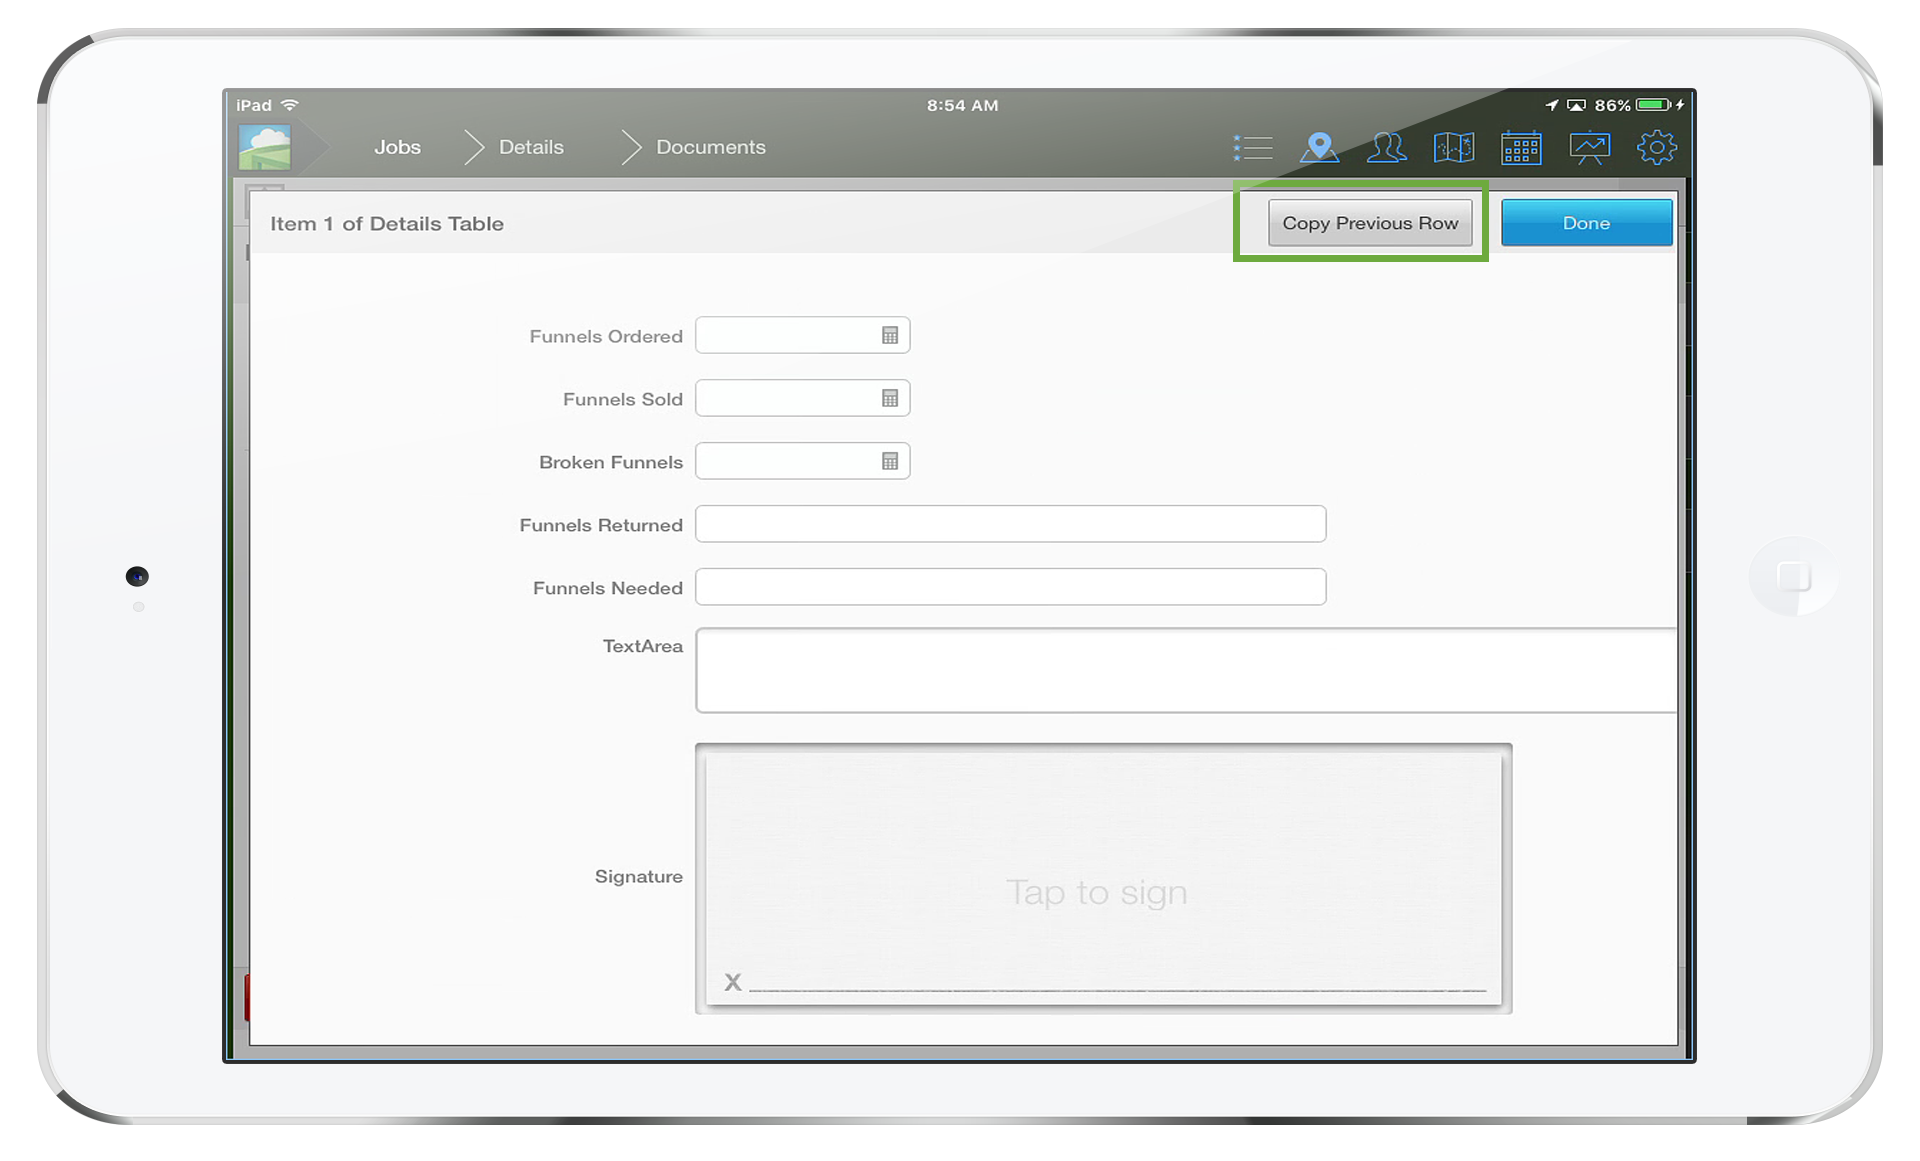
Any subsequent rows that you add information to will show an additional button on top that lets you copy the data from the previous row into the current one. This is a great time saving feature, especially if you have tasks which require similar data to be inputed.