Advanced Catalog
This is the how to guide to adding, using and configuring the Catalog control using the Field Squared app. See this article on how to setup an Catalog and it's contents.
Catalog Structure
Every catalog is composed in a hierarchical tree like structure with categories being the top level followed by sub-categories and items. Our recommended structure for organizing your data is shown below in the image.
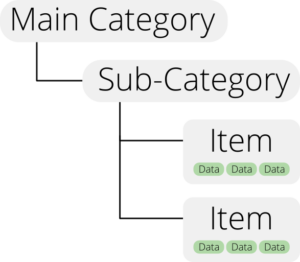
Every item in a catalog is self contained, including it's associated data.
Creating a catalog
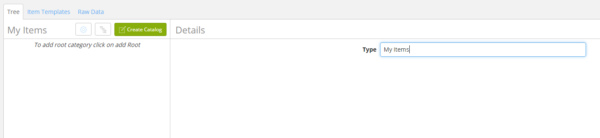
To create a catalog, enter the app builder by clicking the gear icon on the top right of the WebApp. Next click the Create Catalog button. You'll be presented with an input box labeled 'Type'. Here you can name your catalog whatever you'd like.
Next you'll see as small button to the left of the green button with a structure diagram on it. This button is is to add a new category to the root of your catalog.
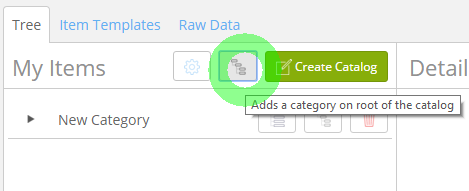
You'll see a category item labeled 'New Category'. This will be your main category for your catalog. You can add as many main categories to you catalog as you would like. On the right side you'll see a field to name your category.

From here you have a few options.
- Add items to your category
- Add sub-categories
- Add items to your categories.
For the sake of this tutorial, we have an existing catalog for you to see. We call this catalog Auto Parts. It's been populated with, you guessed it auto parts.

Items
Each category can have individual items added to it. This is done by clicking the left most button with the tree like structure as an icon.

This will add a new item under the category from where the button was pushed. On the right side of the screen you'll notice we have several data items associated with the each item.
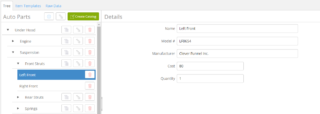
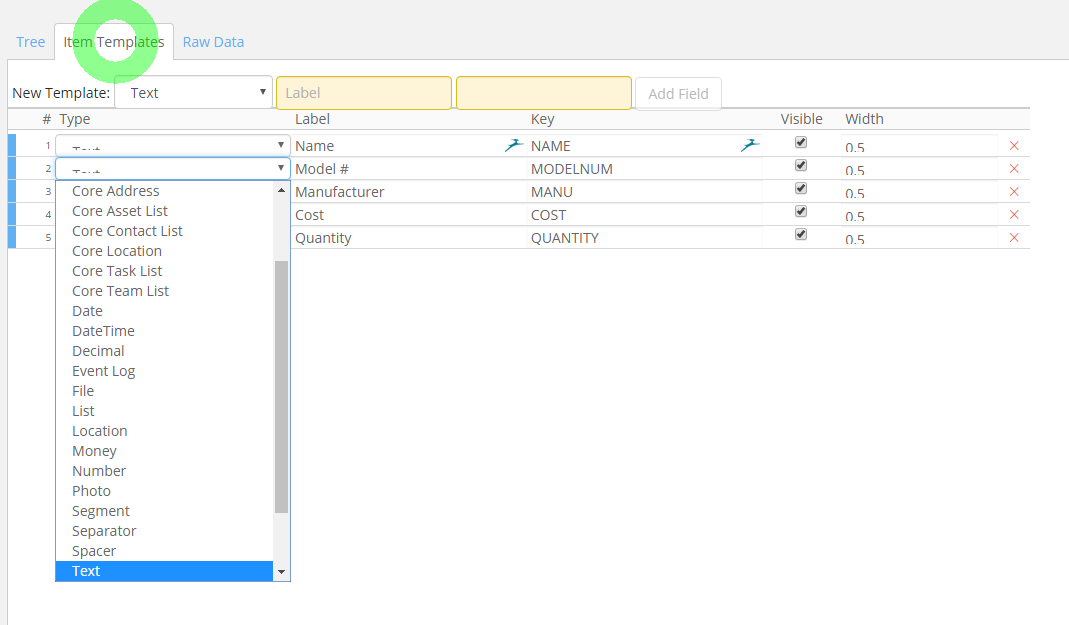
These data items are added via the Item Templates tab using custom fields.
Learn how to use Custom Fields.
In the Item Template section you can assign any type of data to your items. Just remember that templates can only be assigned to one catalog at a time. You cannot have two templates assigned to one catalog.
In this example we have added 5 data fields. 3 Text fields, 1 Money field, and 1 Number field. The width of each field is customizable from this screen as well. Note: You can add as many custom fields as you'd like to each item template.
Special Note: Remember to give each field a unique KEY name. It must be capitalized. This will be very important when it comes time to add and retrieve item data in your documents.
Catalog usage in a document
Now that you have your catalog ready to go it's time to add it to a document.
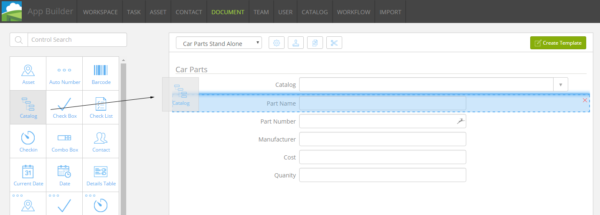
Adding catalog controls to a document is easy. Open a new document or edit and existing one. On the left side of the screen you'll see a list of boxes with icons in them, these are document controls. Locate the Catalog control and either drag it to the middle document pane or double-click it to add it in faster.
Assigning a catalog
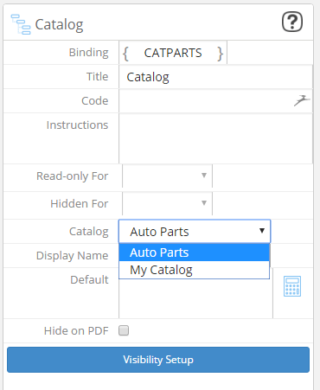
When you first add the catalog control it will not have any catalog information, you must assign it a catalog in order for it to work correctly. This is done by clicking the Catalog drop down menu and assigning a new catalog to the control. To this catalog we are giving it the binding of CATPARTS. This binding name will come in handy later when retrieving data from this catalog.
Next we'll add Smart Text controls to the document. In this example we've added five controls and labeled them the same as our custom fields from earlier.
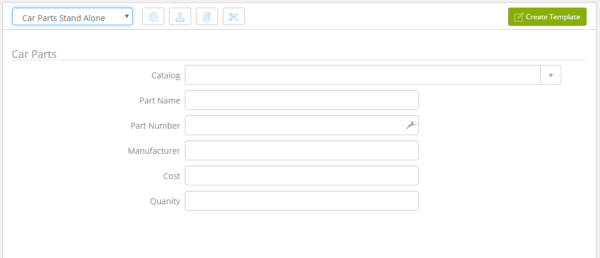
Configuring catalogs
We're going to use and example where there is a catalog control in the document as well as Smart Text controls which will retrieve and display data from the assigned catalog. It's a bit tricky at first but you'll be a catalog champion by the end of this.
Now it's time to configure each smart text. You're going to have to use expressions to get the information you want to appear. Start by clicking on a smart text control. You'll see it's individual settings on the right side of the screen. Here is where we'll add our information.
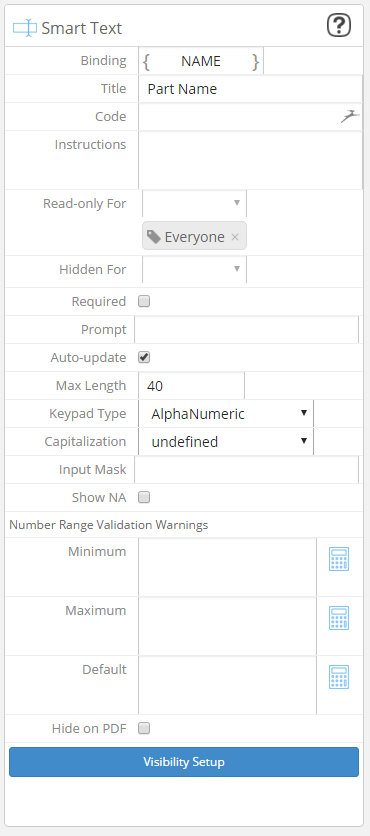
As you can see the binding we used with this control is the same as the custom field key in the item template. You don't have to have the same binding name in these controls, we just did it for the sake of simplicity.
In this example we've given this control the label of Part Name since that's what it will be displaying. We've also made this control read-only for everyone. This is because we don't want people changing this value. You can set it to be editable if you want and your needs require it.
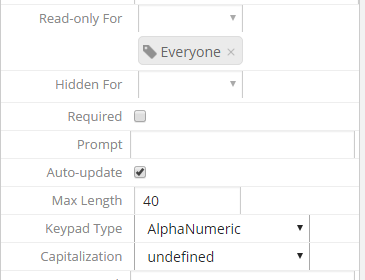
Next We've checked off the Auto-update so that when you select an item this field will automatically populate itself with data. Very useful. Our keypad type is AlphaNumeric, although it can be set to undefined since this control will be read-only.
Default
The default text area at the bottom is where smart text controls become smart. In this area you must add an expression so it knows what data to retrieve and display from the catalog.
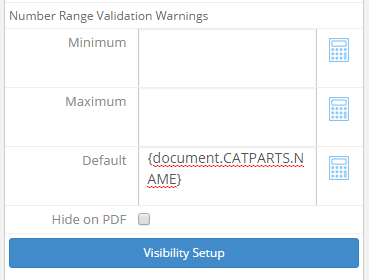
Expressions in this section have a structure you must follow in order for the smart text control to work correctly. In this example we have:
{document.CATPARTS.NAME}
This expression is structured as:
OBJECT.BINDING.KEY
Document being the OBJECT we're referencing, in this case it's this document.
CATPARTS being the BINDING name of the catalog we want to retrieve data from.
NAME is the KEY name of the custom field we want to display.
This expression can be added to a sub-document as well. The only thing that changes is the OBJECT text.
{subdocument.CATPARTS.NAME}
Using this same form as a sub-document will allow you to put all the data from the fields into a details table.
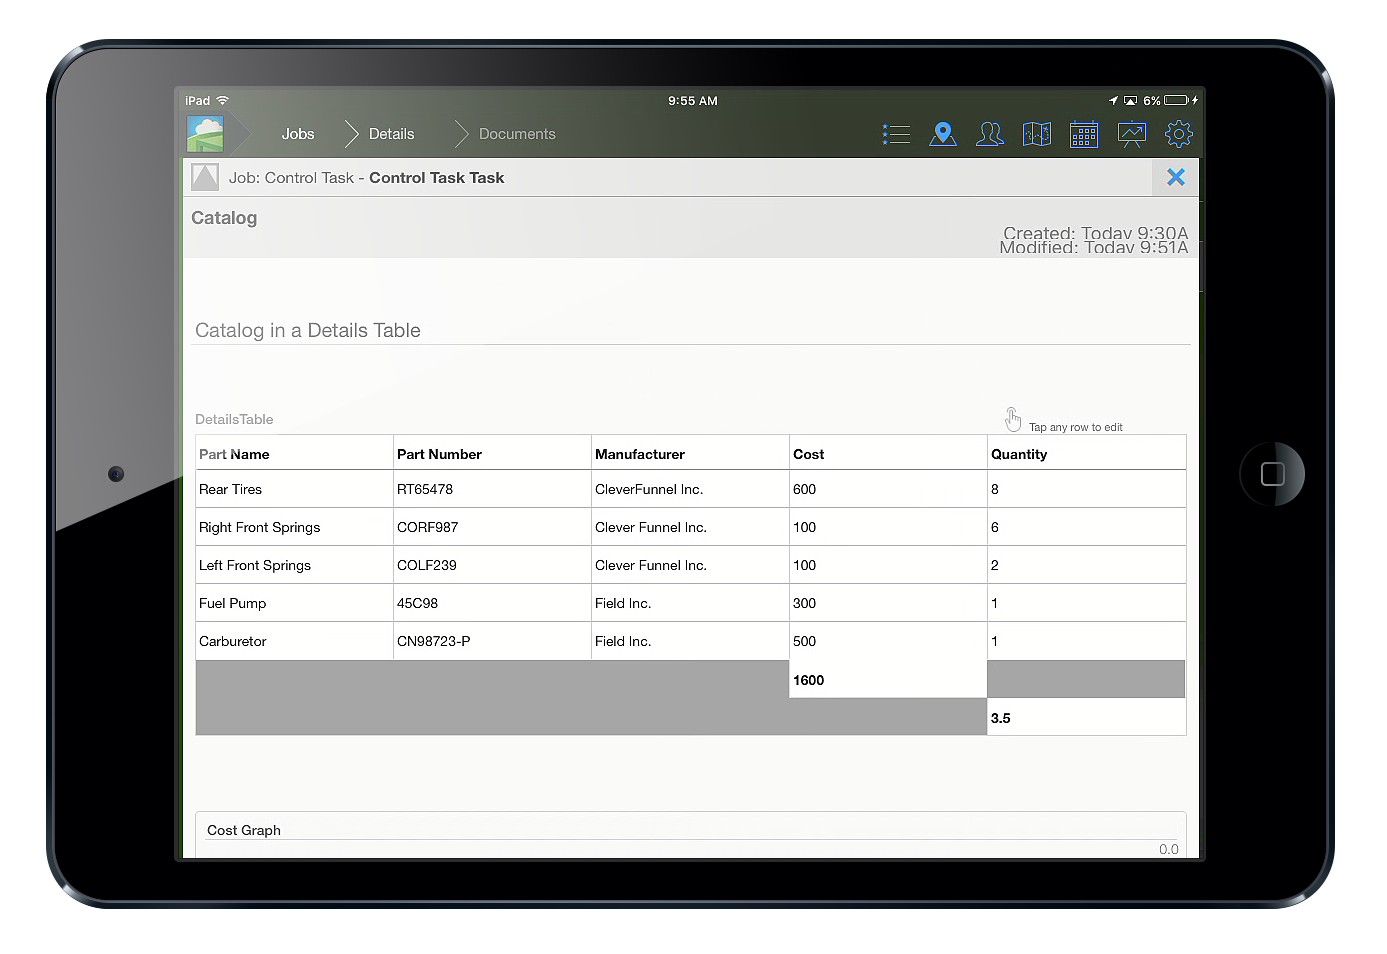
Details Table
Catalogs pair great when used in conjunction with Details tables. It makes it easy to keep track of and add multiple lines of data. Learn how to make and use Details Tables.

Sub-Document
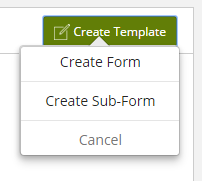
First we start by making a sub-document with our catalog controls. How to make a document with catalog controls is discussed above. The difference is that you must select to create a sub-form first, then add you controls to the document. In this example it will be the same document with the same controls.
Details Table
Next we will make a new form which includes the details table we want information going to.
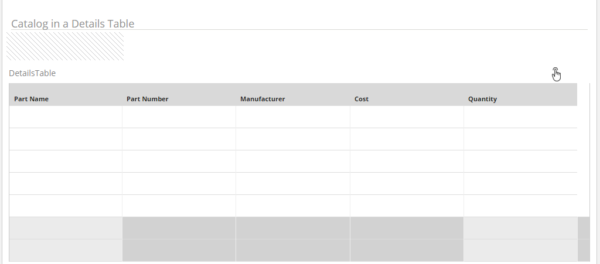
Once added to your document click the settings panel on the right. This is where you'll be able to assign the details table it's catalog sub-form.
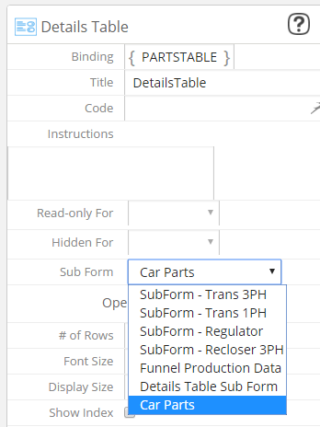
Remember to give this table a unique Binding name, this will come in handy. Give your table a Title which will show up in the mobile app. Next assign your sub-form using the drop down menu and selecting the sub-document we just made. This will change what the details table looks like.
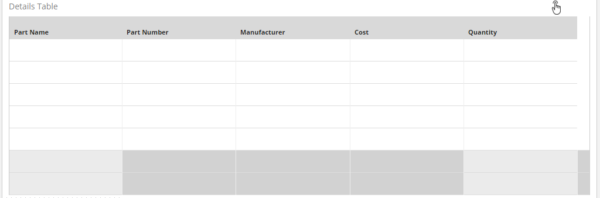
Next we can decide which data fields will be shown in the details table as well as deciding what fields will show Totals and/or Averages.
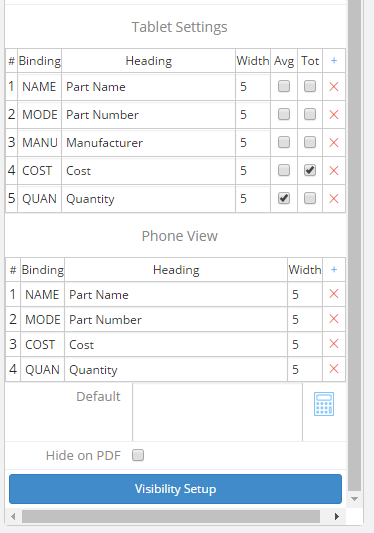
You can even set the relative width display for each field. Note: Phone view has it's own separate display configuration. This is because not as much information can be shown at one time on a phone vs. a tablet. All your sub-form information is still stored just not displayed.