Adding new users
Adding new users to your Field Squared app is easy. Start by heading over to the app builder section of the website. Click the gear icon on the top right of the page. This will take you to the app builder interface where you will be able to add new users, edit existing users and edit their permissions and more.

Creating a user
On the top right of the app builder there is a green button labeled Create User, click it.
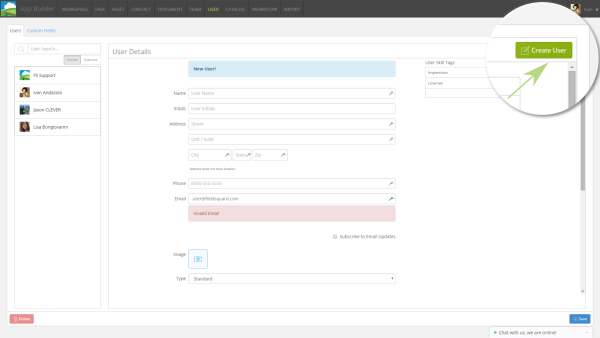
Next, you’ll see a new page where you can fill out information about your new user. Keep in mind all the fields for users can be configured to fit the needs of your company. For this example we’re using the following default fields:
- Name
This field is meant to use both first and last name - Initials
This field will show up in various places throughout the app - Address
This field is for adding address information about team members. This field will be validated and GPS coordinates will be added - Phone
Enter the phone number of your team member - Email
Enter the email address of your team member - Image
Upload a photo of your team member. This makes it easy to assign tasks/jobs/duties to various team members - Type
Type of user- Subscription Admin
- Dispatcher
- Standard User
- View only

Learn more about Types of Users.
Optional. In this example we have chosen to add the following Custom Fields to our user profiles.:
Learn more about Custom Fields
- Employee ID
This is a custom field we have added to this form. - Reset Password field
Area to reset a user's password.
Visibility Settings
This setting allows control over what each user is allowed to see within the application itself.
There are various settings you can choose from.
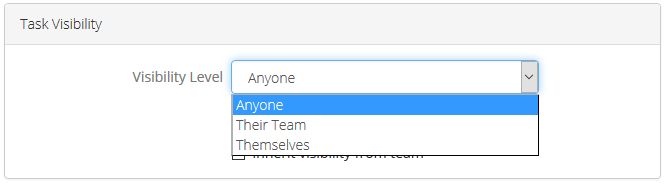
The drop list options are settings as to what Visibility Level a user is. There are three options here.
The Anyone level does not limit visibility for a user. They can see anyones tasks.
The Their Team level limits task visibility to only the team to which a user belongs to.
The Themselves level limits task visibility to only a user. The user can only see tasks assigned to them, no one else.

View Unassigned Tasks, lets users see jobs/tasks which are not assigned to them. When switched off, a user can only see tasks assigned to them.
Inherit visibility from team changes visibility settings to match those of the team a user belongs to.
Custom Fields
If you require different types of fields in your user profiles, these can be added by using the Custom Fields tab at the top left of the users page.

Once you have created all your users, you can now place them into teams within the organization.
Click here to learn how to Create Teams.