Smart Text
Smart Text controls allow for the entry of text using custom keypads, straight text entry, Siri dictation (iOS only), automatic masking, input validation, length checking and the ability to automatically populate with values from any other data point within the system. For example: another control in the same document, current user name, current job’s contact address, and more using string expressions.
Standard
The standard version of smart text will be placed in order from top to bottom.

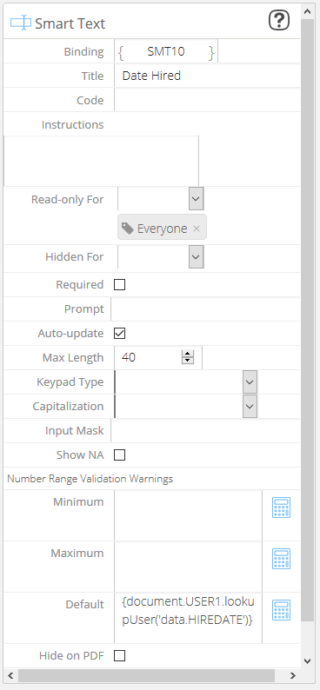
It has it's own setting pane which can be configured for each and every control you add to you specific documents.
Flow
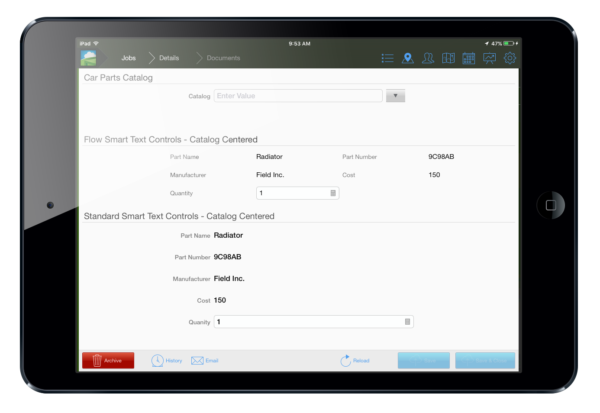
The flow version of the smart text control does the same thing the standard version does only it's meant to be used in a flow layout which looks like a row/cell like layout.

It has it's own setting pane which can be configured for each and every control you add to you specific documents. The flow setting also include options for borders as well as width and row height for each control you add in to the document.
In the mobile app flow controls appear nicely when you take a bit time to get them properly configured.
Smart Means Smart
The smart in smart text comes in the form of each control being able to use custom keypads, straight text entry, Siri dictation (iOS only), automatic masking, input validation, length checking and the ability to automatically populate with values from any other data point within the system (eg. another control in the same document, current user name, current job’s contact address) using expressions.
Expressions
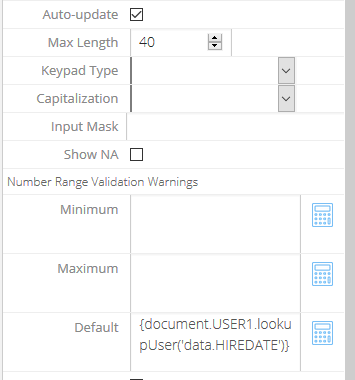
Expressions let you automatically add data, be it text, numbers or other value to every smart text control you add to you documents.
Example:
{document.USER1.lookupUser('data.HIREDATE')}
- Document is the object we're referencing. In this example it's this document.
- USER1 is the binding for the item we want data from.
- lookupUser is the function we're using.
- data is telling the function we want to get data from a custom field.
- HIREDATE is the KEY for the custom field we want data from.
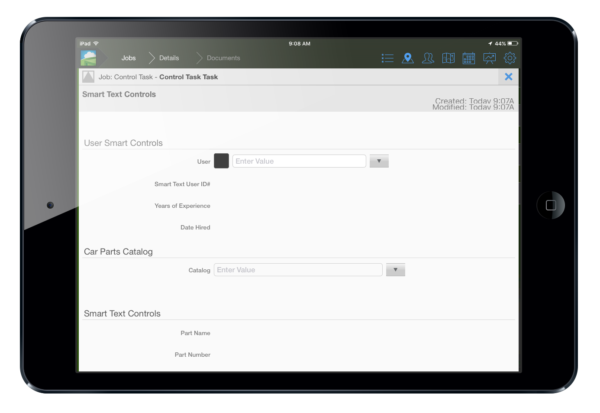
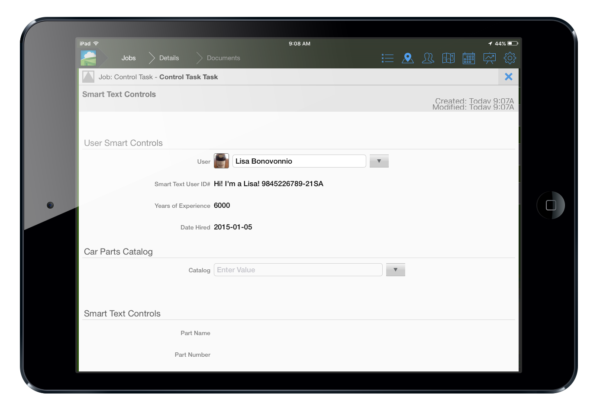
The example above is nicely shown in the mobile app.
Combining Expressions with Plain Text
Anything outside the {} expressions will be copied and output as text. You can however, have multiple {} expression blocks within a string expression.
Example: From within a document that was created against a task that was added to an asset (so both Task and Asset are set when you create the document), you can use the following expression:
Task {task.name} – Assigned: {user.name} for AssetID: {asset.data.ASSETID}
Which would populate the Smart Text control with the string “Task Site Visit – Assigned: Jason for AssetID: 12345678″.
This is just one example of what's possible with Smart Text controls. We know you'll be able to come up with many wonderful ways to use them.
